1. How to connect the lcd display to the arduino Before connecting the LCD display to the Arduino board, you need to prepare some necessary components: LCD display – the most commonly used is 1602 or 2004 specification. HD44780 Driver – This is a control chip specially designed for LCD displays, usually integrated on the back of the LCD display. 16 common pluggable pin headers – used to connect the LCD display driver to the Arduino board. 5 pluggable pin headers – used to connect to the power pins of the LCD display. When connecting an LCD display to an Arduino board, be sure to follow the steps below:
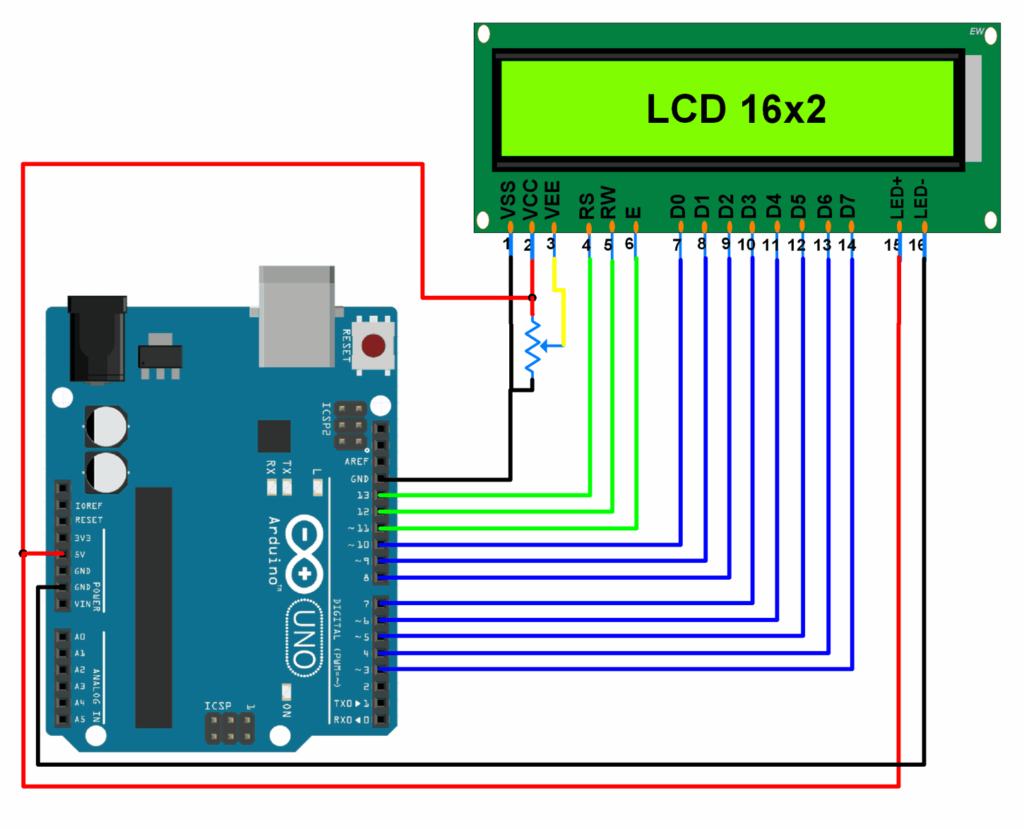
1. Connect the 4 data pins (D4-D7) of the LCD display to the digital pins (2-5) of the Arduino board.
2. Connect the RS pin of the LCD display to the digital pin (6) of the Arduino board.
3. Connect the RW pin of the LCD display to the digital pin (7) of the Arduino board.
4. Connect the EN pin of the LCD display to the digital pin (8) of the Arduino board.
2. Arduino: How to connect lcd display to arduino LCD display can be connected with Arduino in many ways. The most common way is to use the analog I/O port, which allows the display to be connected to the Arduino by using 4 digital signal lines. Another easier way is to use the I2C interface, which only needs to use 2 signal lines to connect the display with the Arduino.